Installing MCP in Different IDEs
Connect Figma, create a project, and configure Locofy MCP in Claude Code, Cursor, GitHub Copilot, or Windsurf.
Locofy MCP is set up from the Locofy Dashboard. The How to use Locofy MCP guide walks you through four steps—connect Figma, create a project, install MCP, and generate your first screen.
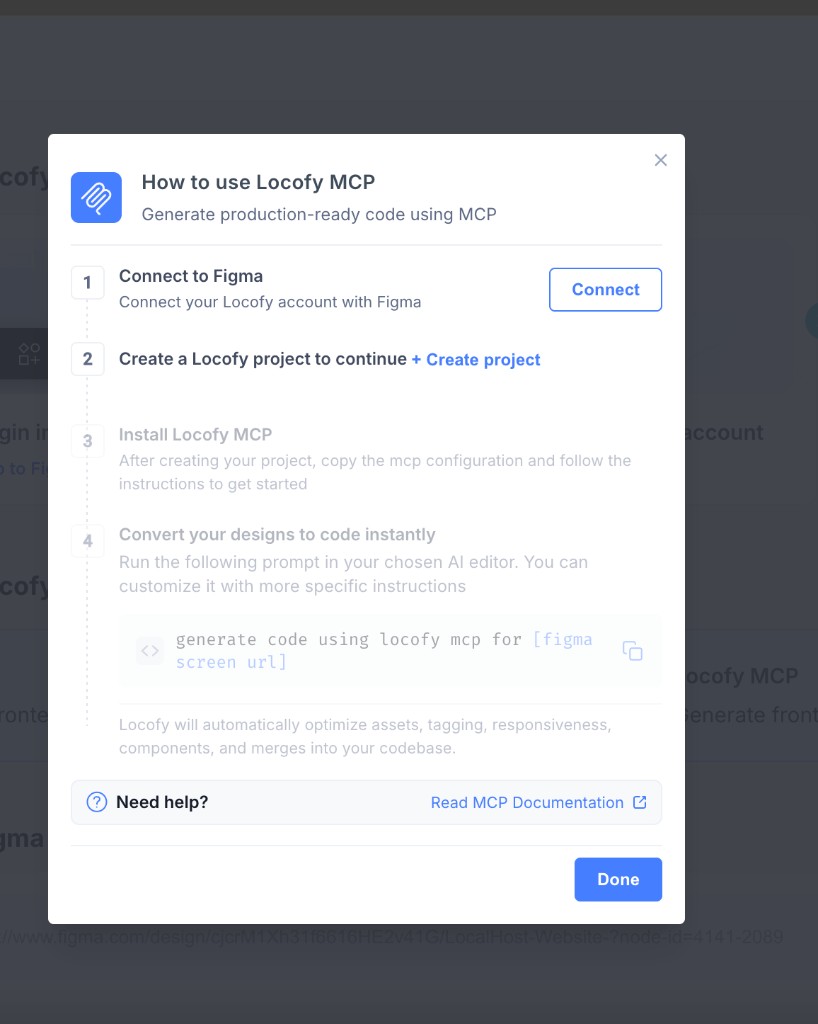
Step 1: Connect to Figma
- Open the How to use Locofy MCP guide from your Locofy Dashboard.
- Under Connect to Figma, click Connect.
- Log in to your Figma account and allow access to Locofy when prompted.
Once connected, the step shows You're Connected. You no longer need to manually share Figma files with Locofy.
Step 2: Create a Locofy project
- Click + Create project in the setup guide.
- Follow the prompts to create a project for your MCP workflow.
When the project is created, the step shows Project Created. MCP configuration is tied to this project.
Step 3: Install Locofy MCP
After your project is created, open MCP Configuration from the setup guide. Copy your credentials and follow the editor-specific instructions.
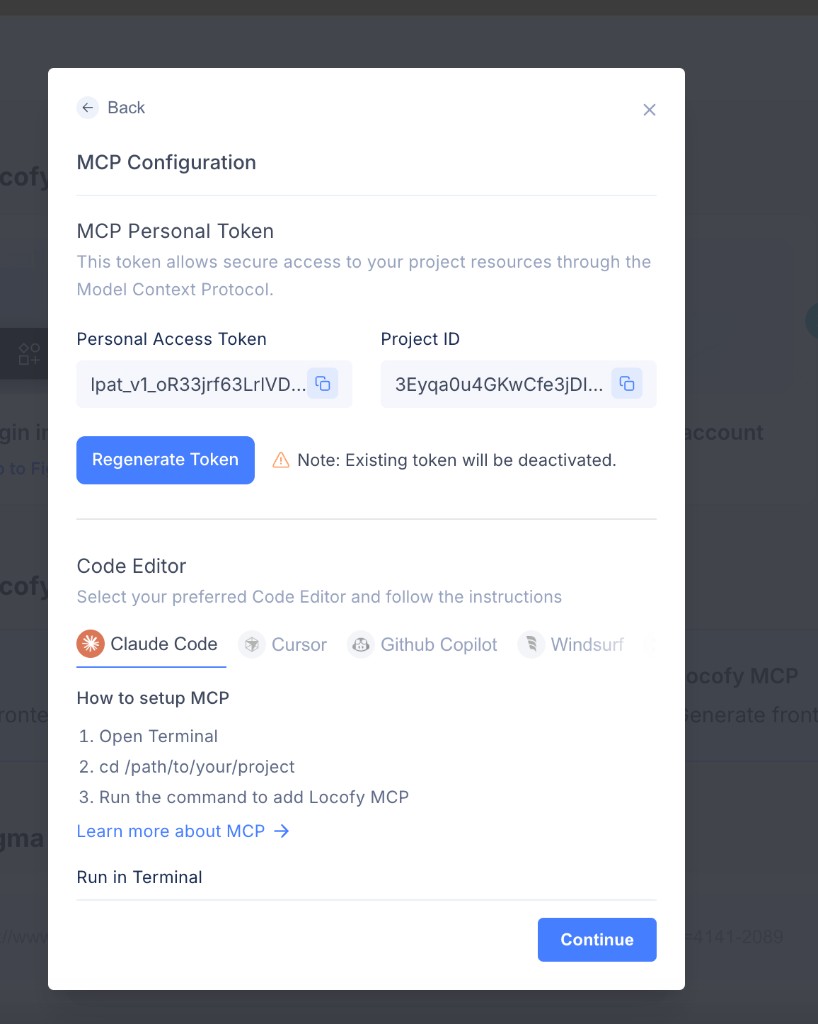
Copy your MCP credentials
- Copy your Personal Access Token — this authenticates your AI editor with Locofy.
- Copy your Project ID — this links MCP tools to the correct Locofy project.
Set up your code editor
- Select your preferred code editor: Claude Code, Cursor, GitHub Copilot, or Windsurf.
- Follow the How to setup MCP instructions shown for your editor.
- Run the command under Run in Terminal from your project directory.
- Click Continue when setup is complete.

Regenerate your token
If your token expires or you need a new one, click Regenerate Token in the setup guide or MCP Configuration screen. Copy the updated token and project ID, then update your editor configuration.
Step 4: Generate code from a Figma URL
When all setup steps are complete, the guide shows a ready-to-use prompt. Run it in your AI editor—customize it with more specific instructions if needed.
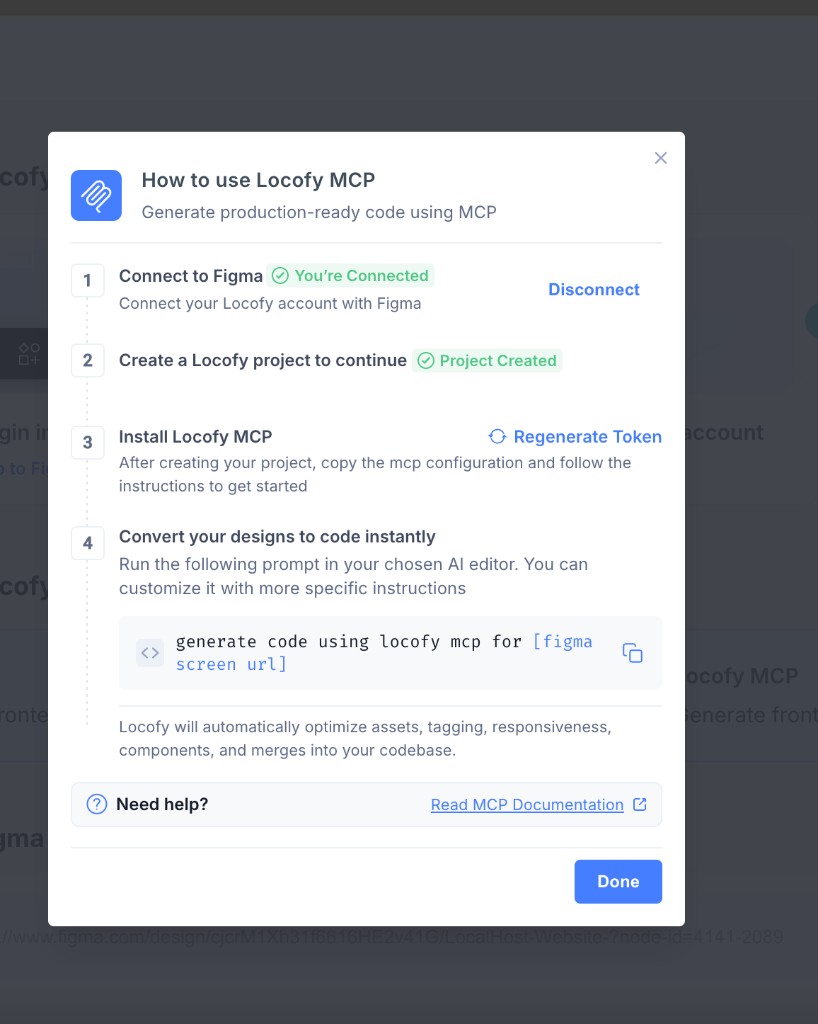
generate code using locofy mcp for [figma screen url]Replace [figma screen url] with your Figma file or frame URL.
Locofy automatically optimizes assets, tagging, responsiveness, and components, and merges the output into your codebase.
See Quickstart for the full generation and refinement workflow.
Manual setup by editor
If you need additional setup steps for your environment, follow the instructions below after copying your token and project ID from MCP Configuration.
- Open Terminal in your project directory.
- Run
cd /path/to/your/project. - Copy and run the Run in Terminal command from MCP Configuration in the Locofy dashboard.
Locofy MCP should now be available in Claude Code.
Troubleshooting
If Locofy MCP fails to start or shows connection errors, clear your npm cache and npx cache:
npm cache clean
rm -rf ~/.npm/_npx
After running these commands, restart your editor and restart the Locofy MCP server.
If the issue persists, please reach out to us on Discord.
What's next
- Quickstart — generate code from a Figma URL and refine with AI
- Design System — map Figma components to your codebase (coordinate with your designer for Figma-side setup)
- Improve code quality — prepare designs and refine generated code with prompts